Authentication
Our authentication system secures access to Home Assistant.
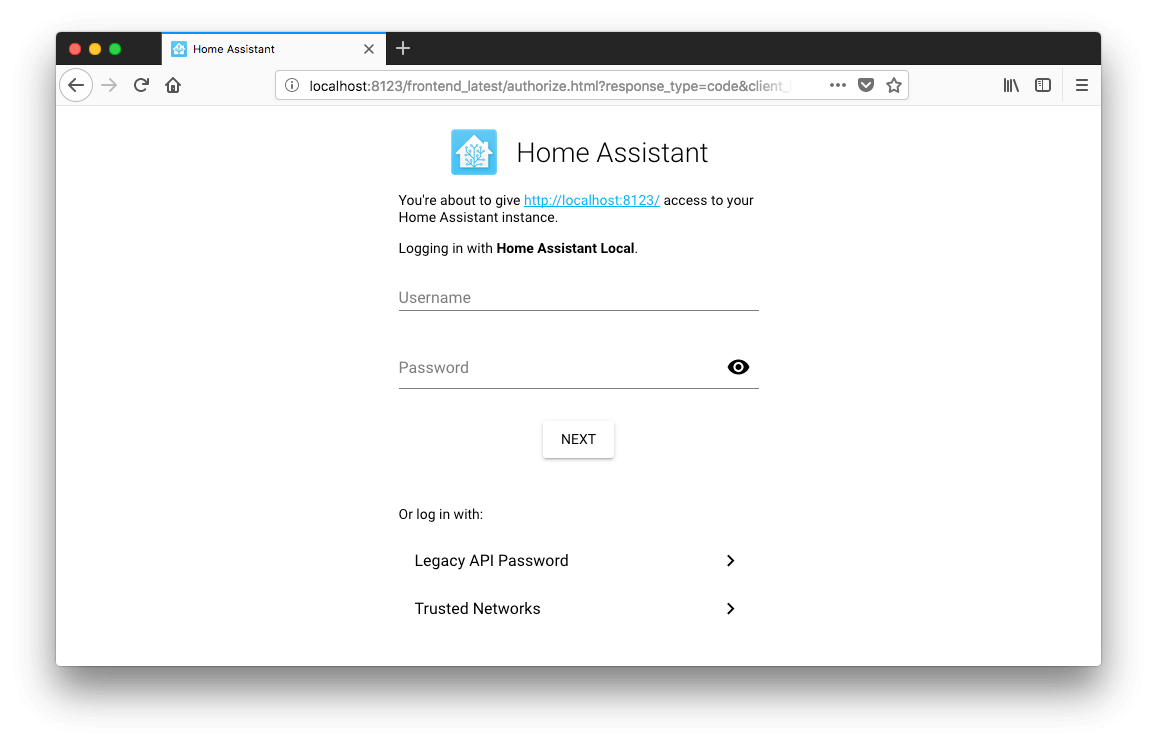
If you are starting Home Assistant for the first time, or you have logged out, you will be asked for credentials before you can log in.
User accounts
When you start Home Assistant for the first time the owner user account is created. This account has some special privileges and can:
- Create and manage other user accounts.
- Configure integrations and other settings (coming soon).
Your Account Profile
Once you’re logged in, you can see the details of your account at the Profile page by clicking on the circular at the very bottom of the sidebar.
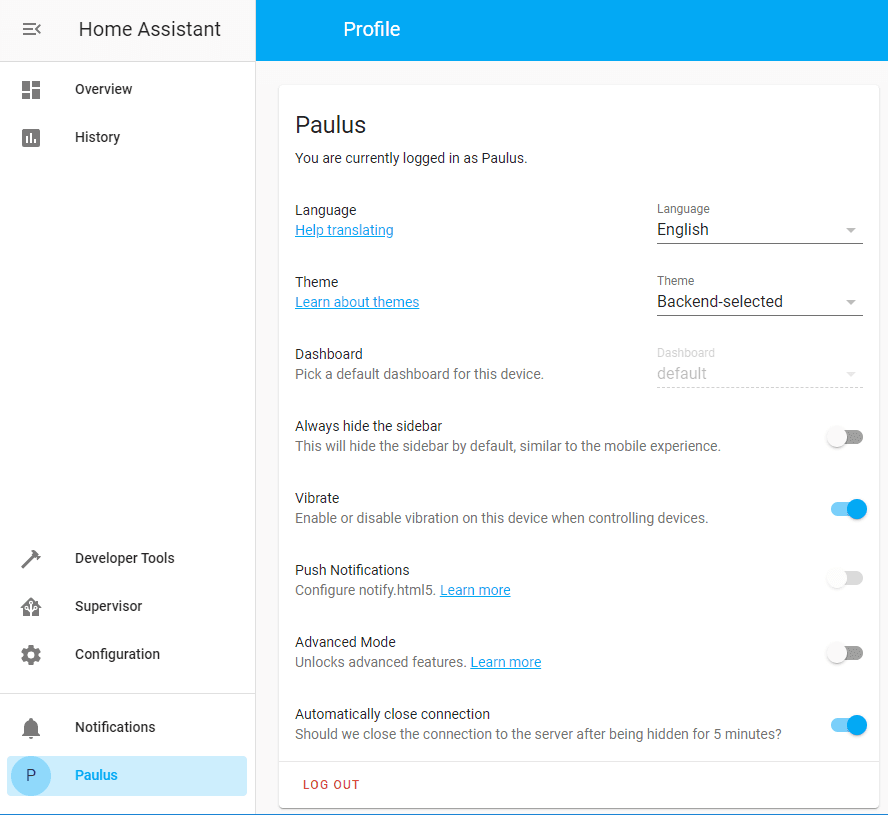
You can:
- Change your password.
- Enable or disable multi-factor authentication.
- Delete Refresh Tokens. These are created when you log in from a device. Delete them if you want to force the device to log out.
- Create Long Lived Access Tokens so scripts can securely interact with Home Assistant.
- Log out of Home Assistant.
Securing your login
Make sure to choose a secure password! At some time in the future, you will probably want to access Home Assistant from outside your local network. This means you are also exposed to random black-hats trying to do the same. Treat the password like the key to your house.
As an extra level of security, you can turn on multi-factor authentication.
Other authentication techniques
Home Assistant provides several ways to authenticate. See the Auth Providers section.
Troubleshooting
Authentication failures from 127.0.0.1
If you’re seeing authentication failures from 127.0.0.1 and you’re using the nmap device tracker, you should exclude the Home Assistant IP from being scanned.
Bearer token warnings
Under the new authentication system you’ll see the following warning logged when the legacy API password is supplied, but not configured in Home Assistant:
WARNING (MainThread) [homeassistant.components.http.auth] You need to use a bearer token to access /blah/blah from 192.0.2.4
If you see this, you need to add an api_password to your http: configuration.
Bearer token informational messages
If you see the following, then this is a message for integration developers, to tell them they need to update how they authenticate to Home Assistant. As an end user you don’t need to do anything:
INFO (MainThread) [homeassistant.components.http.auth] You need to use a bearer token to access /blah/blah from 192.0.2.4
Lost owner password
Before using the procedure below, make sure you explore options provided here.
While you should hopefully be storing your passwords in a password manager, if you lose the password associated with the owner account the only way to resolve this is to delete all the authentication data. You do this by shutting down Home Assistant and deleting the following files from the .storage/ folder in your configuration folder:
authauth_provider.homeassistantonboardinghassiocloud
When you start Home Assistant next, you’ll be required to set up authentication again.
Error: invalid client id or redirect URL
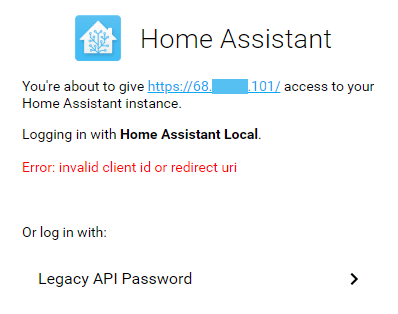
You have to use a domain name, not IP address, to remote access Home Assistant otherwise you will get Error: invalid client id or redirect url error on the login form. However, you can use the IP address to access Home Assistant in your home network.
This is because we only allow an IP address as a client ID when your IP address is an internal network address (e.g., 192.168.0.1) or loopback address (e.g., 127.0.0.1).
If you don’t have a valid domain name for your Home Assistant instance, you can modify the hosts file on your computer to fake one.
On Linux edit the /etc/hosts file, and add following entry:
12.34.56.78 homeassistant.home
Replace 12.34.56.78 with your Home Assistant’s public IP address.
This will allow you to open Home Assistant at http://homeassistant.home:8123/
Stuck on Loading data
Some ad blocking software, such as Wipr, also blocks web sockets. If you’re stuck on the Loading data screen, try disabling your ad blocker.
Migrating from pre 0.77
If you were using the authentication system before 0.77, you’d likely have auth: and auth_providers: defined. You’ll need to remove these and let Home Assistant handle it automatically.